
With Google constantly changing its tools, we come to the new analytics that will be replacing Universal Analytics. Google Analytics 4 streamlines all of your data into one property for seamless reporting. Now that Google Analytics 4 is officially launched and usable on your website it is important to understand how to install it. Here I will teach you how to create and install Google Analytics 4 with your current Google Tag Manager to start gathering data!
What you need?
Set up your GA4 Property
*If you already have a GA4 Property skip this section and head to Installing GA4 in Google Tag Manager.
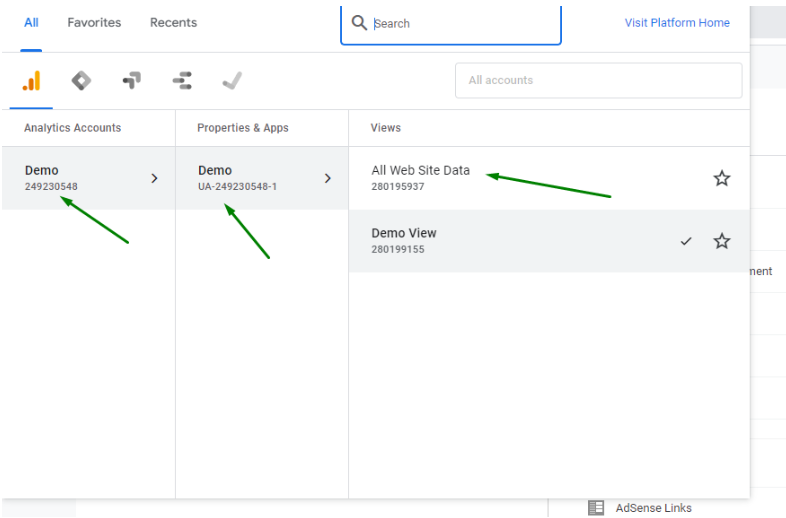
You will head here and click on one of your views. It does not matter what view you click on, you just need to get to the correct account you want to set up your GA4 Property.
If you do not have a Google Analytics account, follow these steps linked here: “Google Analytics Account”.

Once in the view, you will want to make your way to the admin section. Which is found in the bottom left corner of the screen.
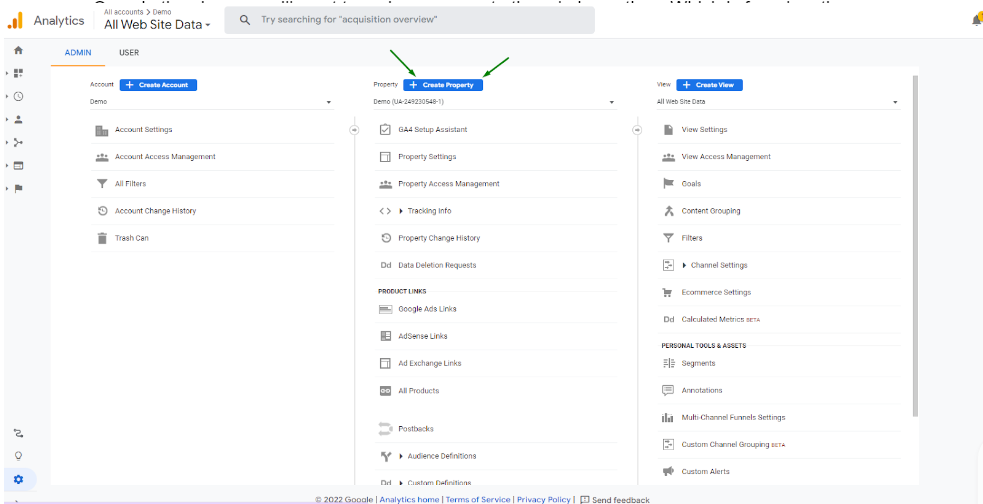
Once in the admin section, we will want to look at the property section in the middle and click the blue button that says “Create Property”. Side note: you will need high enough permissions in the analytics account to create a property so make sure you have the correct permissions.

The next screen that will appear is the property setup screen. Here you will want to name the property. I like to put – GA4 after the name so I know this is a GA4 property. You will also want to change the reporting time zone. This is super important as you want to make sure you are reporting in the correct time zone. After those are completed you will press next.

The next part is just filling out a little information on your business and what you want to accomplish with GA4. This will not affect your reporting. Once complete press create.

Once created you will be directed to the Data Streams section. Here you will see there are 3 types of streams we can measure. Web, Android app, and iOS app; we will continue with the Web stream set-up.

You will then be asked to put your website in the URL section and name your stream. I like to Name the stream to match what the URL name is or business name – website. This keeps things organized when looking at reporting if you have multiple streams in one report.
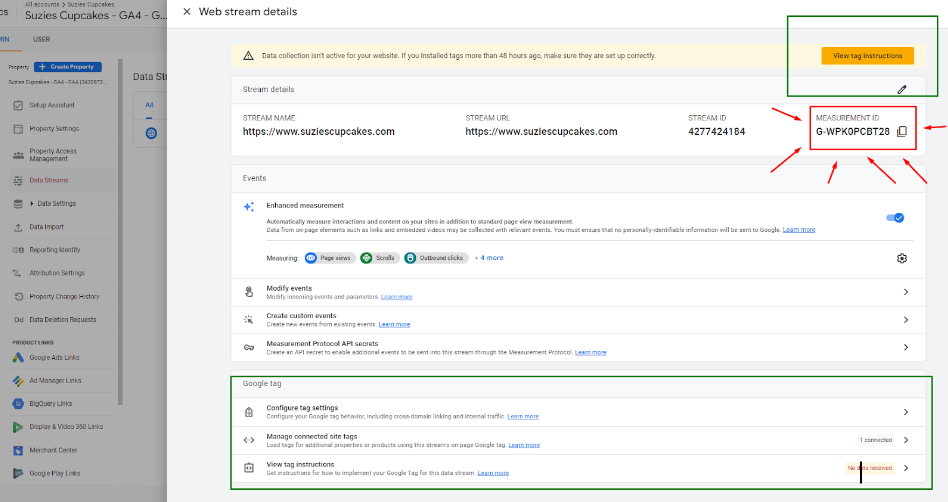
Once created the screen above will appear. You will see; the name, URL, stream id, and measurement id. The Measurement ID is what is important and we will be using that id in the tag manager.
Installing GA4 in Google Tag Manager
*If you do not have a Google Tag Manager account, follow these steps linked here: “Google Tag Manager Account”.

Head to your Google Tag Manager account and click new.
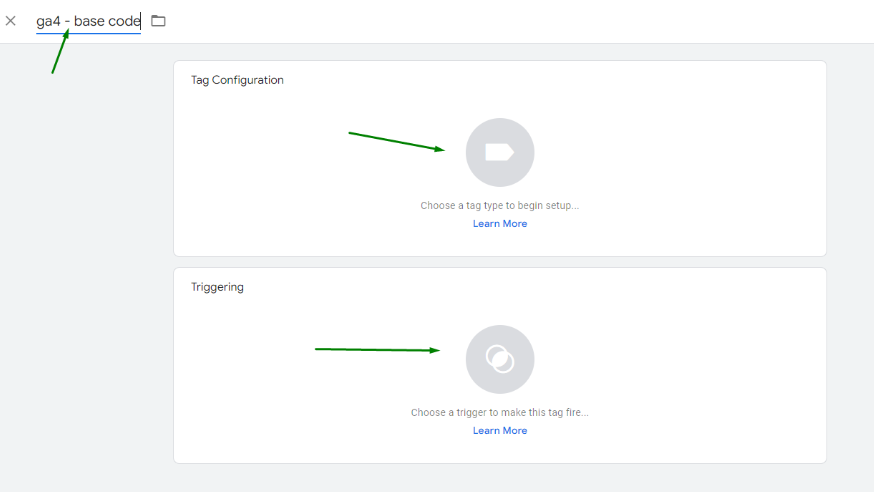
Once here you will want to name the tag. I like to name my tags what tag it is and what it’s used for, like how I named them ga4 – base code. Once named you will click on tag configuration and the triggering.
Tag Configuration –
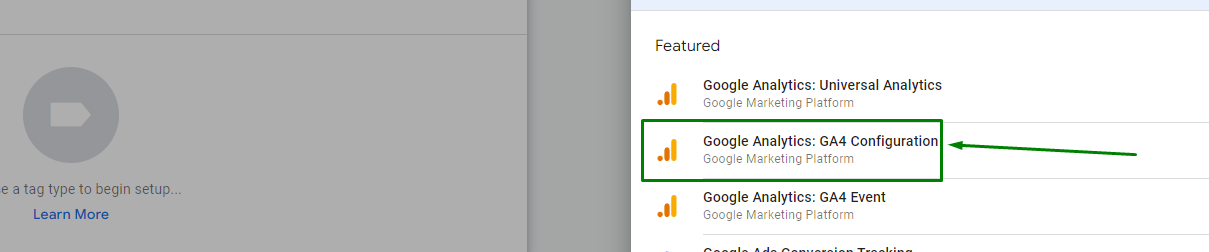
On the right side a side panel will pop up and you will want to click GA4 Configuration.
Triggering –

On the right side a side panel will pop up and you will want to click All Pages.

After you have the Tag Configuration and Triggering setup you will want to head back to analytics and grab the Measurement ID and put it into the box. After your tag looks like this you will press save.

Once finished you will submit your tags so you can start tracking data!
You’re ready to start using Google Analytics 4!
Now that you have the base code installed you can start tracking your data. It can take up to 72 hours for data to start coming into your Google Analytics 4 property so be patient. There are other ways for you to install your Google Analytics 4 but tag manager allows you to have control over the installation. If you want to learn more about Google Analytics 4 check out Google’s documentation “here”.
Recent Comments